About Me

My photo
We JUST got married July 30 2010 on the Starship Yacht in Tampa Bay. This blog is to showcase the awesome DIY details that will make our guests feel how special they are and how much we appreciate them coming. This is my first blog! So far I am enjoying doing this. I just got a new job teaching 2nd grade and I plan to make a class blog as well so look out for that pretty soon!! Thanks for viewing my blog :)

Sunday, August 15, 2010

Photographer's Photos!!!!!!!!


Katherine Ruddy and Greg Dee were awesome wedding photographers. They are also friends of the family, which was nice.....they were like guests and not annoying in-the-way photographers. The pictures came out awesome!! All 5000 of them (and I am getting a CD with them ALLLLL on there, not just what is on the website!)

Thank you guys so much!

PS: I am drinking water.

Saturday, August 7, 2010

Wedding Fans (fans = people that like us, and the things you use to create a cool breeze)

I have always been a fan of fans (he he he......) so when I suggested getting them for our wedding, my wonderful mom (making it happen for me once again!!) got online and found beautiful orange silk hand fans (WILL GET THE WEBSITE FROM HER!!) on sale, and she found these beautiful cherry blossom HALLEY AND ANDREW stickers for them, on sale as well. Totally cute, totally loved them!


So we decided to use the fans for something more than a breeze making device (and on the top deck of the yacht, they were definitely appreciated by our guests! Blocking sun and cooling them off!). I got some paper tags with string on them from Michaels, and I got clear avery labels from Staples. They have a lot of size options so make sure you get a size that is appropriate for your project!
We had 10 tables and we picked 10 of our favorite things or places (Charley, Griffey, Giraffe, Yankees, Red Sox, Long Island, Vermont, Lawyer, Teacher, Xbox and Wii) this way EVERYONE could sit at our FAVORITE table instead of numbering them....(more on them later!)


You will need some matte finish fixative spray, I got mine at Walmart but you can get it at a craft store too, if you use a thicker font because the ink never really does DRY...and after all the time and work you don't want them all smearing (AHEM I found this out the hard way on a few but remembered the fixative from my Interior Design days at UF!)


So by now you know I loved using my $1 stamps from Michaels....
So I stamped the back of all the tags to give it a little something pretty :).


Then we just wove the tag strings in between the wood parts of the fan and that was that!


See July's seating post for the special tags I made for some of our family members :)


Here are some pictures of our wedding guests enjoying their fans!! :)


Remember My "Bride and Grooms Sides'" Post?

Well here it is in action!

Here is my mom attaching it:


Also here is a shot of the top deck (ceremony site) where we put our large POM flowers (which are a lot easier to make than the small ones). Here is a link for how to make these Poms.

Friday, August 6, 2010

What is a POM? How do you make a POM?

A POM, my friends, is a small flower-like wonderfulness made with styrofoam balls, hot glue, and pins (decorative pins are optional).

I originally saw the Pom Flower on the website Once Wed under DIY Weddings. They call it DIY POM POM FLOWERS..
I thought they were pretty cute but never imagined making them. Then my good childhood friend Brittany posted some facebook pictures of her making POM flowers to decorate her room!! When I saw that she was able to make them, I knew I could probably make them too........though at that time I didn't take into account that I would be making between 80-100 FULL poms, and she only made 3-4 half poms to hang flat on her wall..................My mom told her it's a good thing my family lovers her so much at my wedding shower b/c we had been making POMS POMS POMS seemingly every second of the day.

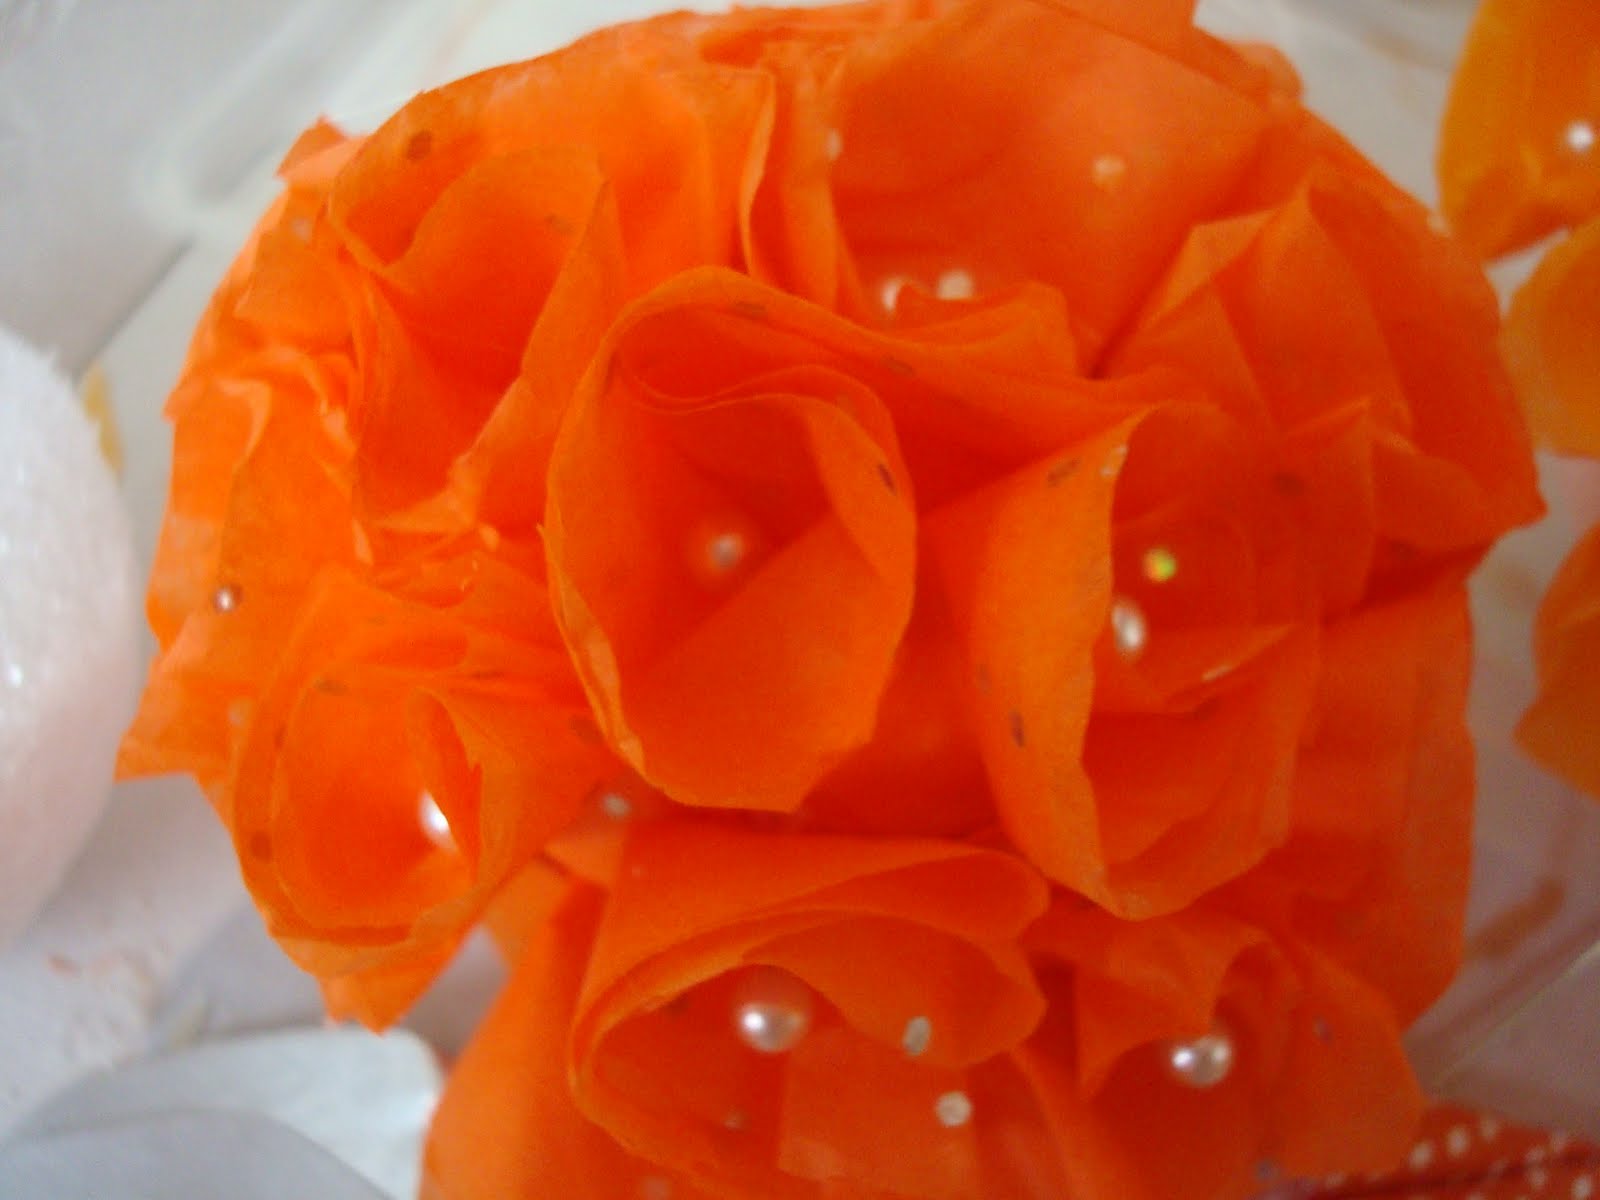
So here are some pictures of our Pom Flowers, and below you will find a step by step picture instruction of how we made them.
We started with fabric but then my mom found this FABULOUS orange sparkly tissue paper! I will get the website from her and add it when I can.


HOW WE MADE OUR POM FLOWERS:

We used 2"- 2 1/2 '' regular styrofoam balls you find in the floral section of a craft store. We used a cup as a circle template (the circle is the "petal") that was proportionate and appropriate to our size ball (if you are using a large styrofoam ball, your circle will need to be bigger!). You can follow the directions on ONCE WED as well but we found some shortcuts....

We used two different color oranges for some contrast and interest and YES the dark orange paper has sparkles in it! Thanks mom!!! :)


First you fold the circle in half; you will have a half circle (duh!). You do NOT need to glue anywhere yet.

Then, you fold your half circle in half so you have a triangle shape. DO NOT crease the folders tightly - just fold it and let it be loose.

Next you put a dab of hot glue across both folds.

Next, fold the triangle shape in half, making sure the glue attaches both folds to the other side. You may want to stick your finger or a pencil in the center of the "petal" to fluff it up a bit, otherwise it will be flat...


Then you will proceed to attach them to the styrofoam balls with decorative (or regular) pins. (I have pictures of this to add later but will explain now!). Lay the petal on the ball, pointy side down. The more of the point you have flattened on the ball, the less petals you will end up using (b/c you will be covering the ball more). When you decide where you want the petal, get a pin and insert it into the center of the petal, straight down into the ball. You might have to take it out and put it back in to figure out how it looks the best. Trial and error :) It takes a long time but it's fun! And I love them!

Thank you to my mom and Kristen for making my Pom dreams come true at my wedding :)


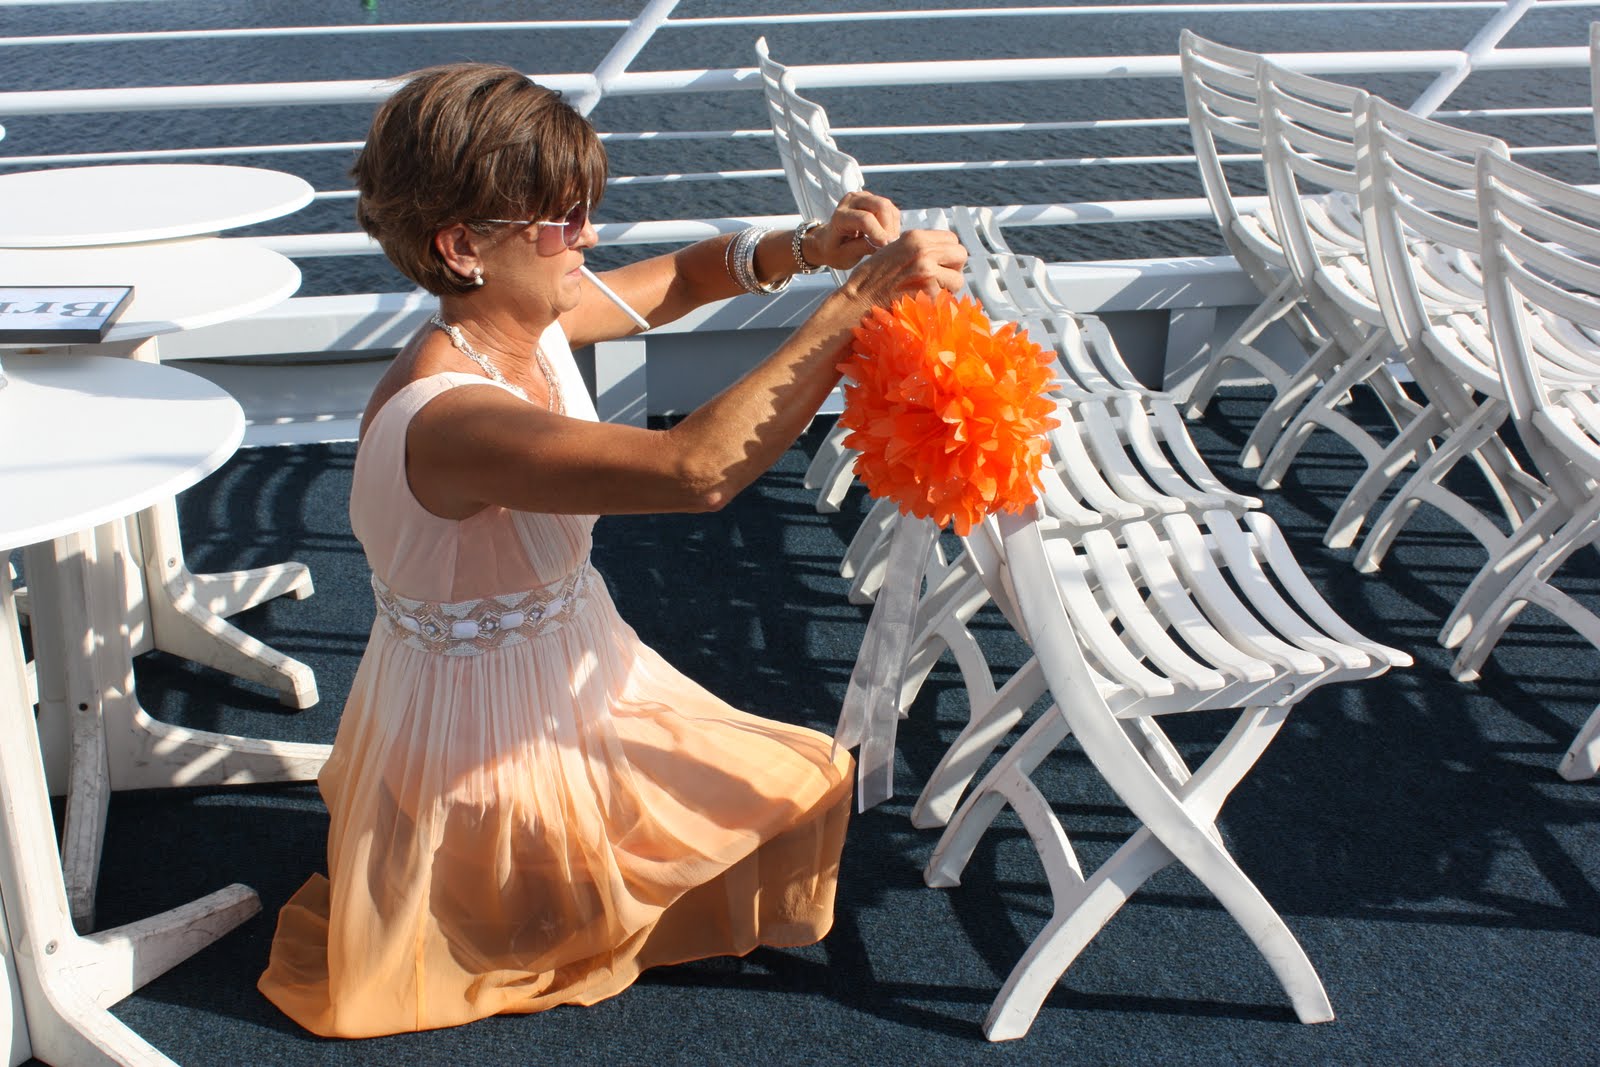
After the Poms were made, my wonderful mother ordered "Halley and Andrew" silver ribbons and tied them in bows. We put them on the champagne flutes at the tables to create a center line and some vertical interest. I wish we could have made GIGANTIC ones and had them all over the place but when you see the HOW-TO photos below...you'll understand!


PS: The linens were supposed to be a light organza grey/silver.....but I showed up to a dark grey crushed thing. Nothing I could do about it then....didn't even say a word to the wedding coordinator from the boat. If you can't change it....don't worry about it.

Ok Here We Go!!

Well my blog readers (whoever you might be!! I'd love to know but don't feel obligated to tell me.) I Just want to THANK everyone that is reading my stuff! I enjoy doing this but I am glad people enjoy reading it as well...so it's not a total waste of time then I guess!

All the blog postings from here on out will be HOW TO's on how we made some of our things or just pictures of little details and stuff of our wedding. It was a beautiful day and looking at photos and videos has been a great source of ENERGY renewal for myself as I am very tired from the wedding weekend extravaganza but have a lot of work to do as a new teacher :)

School starts Aug 16, Meet the Teacher Aug 12!! Gotta get it ready by then!

I just started working in my classroom too getting it together and decorated (!!) and organized and stuff so it might be slow postings for a bit. Maybe I will use it as my "me" time they told us to make sure we have at orientation ;)


So enjoy....COMMENT......ask questions.......add ideas.........and above all thank you for reading my blog :)

Monday, August 2, 2010

Mrs. Urbanak officially

Well sort of..we still have to send in the license :)

Anyway the wedding weekend extravaganza is over and though I had a LOT of fun and enjoyed seeing everyone, I am tired and sore and glad to be home. The wedding was great, some minor things (table linens, cupcake serving...Andy's vow slip up! lol) were not perfect but other than that it was pretty perfect!

And now I get to work on my blog and put everything up!!!!

Please keep our family dog in mind. The dog walker never came to let him out and he was alone and without food or water from Wednesday till Sunday night. We rushed over there when I found out (my parents still were on their way home from the wedding weekend) and I took him right to the pet hospital. He is very old, a 13 year old bichon, and has a few small age-related health issues but I hope he will be OK. It was not a good way to end the weekend, and I feel really bad he was suffering in there :( I would have driven home in my dress and all to take him out and give him water and food. See you soon Hercules!

Now I go to new teacher orientation. Exhausted and achy.

Friday, July 23, 2010

Dress Distress

Wow I am getting good at catchy blog post names!!

Anyway, I finally got my dress, a week past the date promised and only a week before our actual wedding...and what's WORSE: They wanted to keep it AGAIN and fix it AGAIN!!!!!!!

I understand I am a pretty small person, but I have been the same weight and measurement the entire 4 months I've "owned" this dress....so why is it still bigger around the waist and chest than it should be??? The seamstress, who was VERY sweet and was really just trying to help, tried to make me wear one of those full body bra type things to add some size to my frame and help keep the dress up...............I totally lost my composure and started CRYING in the middle of David's Bridal b/c I, in no way, for any reason, plan to be uncomfortable at my own wedding. And let me tell you this full body bra was the epitome of discomfort. She said "Well, the bride isn't supposed to be comfortable!" And I said "WHAT!?! That's ridiculous. I manage to look nice everyday AND be comfortable at the same time!!!"

Then she tried to sew pads in the chest....

Then she tried to attach straps.......

Then she tried to tell me she was going to take it in another inch and a half on the waist......(and it looked good like that but I wouldn't be able to eat, breathe, talk, sit, or move....not AT the wedding and not during this next week leading up to the wedding!! Not gonna happen!)


I felt really foolish and she felt really bad that I was crying but I have been really tired lately and I was concerned b/c I am leaving for Tampa early next week and I was worried about leaving my dress there AGAIN.

It's a simple dress, it's elegant....and IT'S COMFORTABLE!! Imagine that?! This just in: You don't need a heavy, uncomfortable, gigantic, cake-top dress to look like a bride. :) Get what YOU like and get what fits YOUR style and that's that.

Thursday, July 22, 2010

Bride's and Groom's sides

Since my good side, and my sister's good side, is our left side, we are going to be standing on the right whereas the bride usually stands on the left. So I made these signs to make sure our guests were clear on where to sit. I am attaching silver ribbon to the back and they will be hanging on the last chairs to either side so when the guests get up to the top deck they will see the signs right away! :) Clearly I love using my stamps!! Quick and cute!


THE orange shoes! SNEAK PREVIEW!!!


These are my favorite shoes in the world!!!!! When Andrew and I got engaged (November 20, 2009) I knew I wanted to wear them at our wedding, and not even knowing the date at that time!! I packed them up in a shoe box to preserve them for the wedding. It was really hard not to wear them since they are my favorite! This is where the ORANGE stemmed from....I mean orange is my favorite color but if done wrong can look really bad!!! My mom has been trying to talk me out of wearing these shoes!!! What sense would the orange everything else make if I don't wear my color inspiration?? She likes really high "fabulous" shoes, and I cannot and will not walk in heels so.


I did try to wear heels once on our 1 year anniversary outing to St. Augustine.....and low and behold I ended up changing....into none other than my orange jeweled flats!!


Can't say I didn't try! :)

Tuesday, July 20, 2010

Why Did I DIY?

A lot of people associate DIY things with being cheap....and while DIY projects CAN be cheap projects, that's not exactly why I wanted to have so many DIY things at our wedding. My parents are wonderful and would have gladly gotten us whatever we wanted for our wedding...so it wasn't really about the money.

I don't really like weddings....they only last 4~ish hours and you spend all this time thinking about little details that will likely go unnoticed. I don't understand people buying a bunch of things that are mass produced to have at their wedding so people ooh and aah at them....but it's generic things and it's not really a representation of the couple, and may not even be what they wanted but instead had to settle for.

All the DIY projects we selected and executed are things that WE liked and feel would create a wedding that represents our style. People spend so much money on flowers to sit on a table that die and get thrown out after 4 hours? It just doesn't seem logical to me. I guess I am too logical and practical to have a regular wedding.

Not knocking anybody else's wedding that pays for the flowers to die, that's just not for me. I honestly hate when people compare weddings. Every person/couple has such different tastes and backgrounds and preferences and styles and budgets and families.......I don't think you can compare weddings. If you are planning a wedding, do what you want to do and take other people's input but keep in mind they won't have to look back on it wishing something was/wasn't there at their wedding.

Competing with or comparing your wedding to other people's will drive you crazy and essentially you are creating your wedding for someone else if you do that, and not yourself.

Saturday, July 17, 2010

"How Long Did All This Take You???"

Well.....we decided to get married only 4 and a half months before our chosen wedding date of July 30, 2010. We selected that date based around baseball; it was the last weekend in the summer that the New York Yankees were going to be in Tampa playing The Rays, and we knew we wanted our wedding weekend to involve baseball.....but that's just us!!!

In any event, we only had 4 months to plan and execute all these wonderful DIY things, and I didn't have that many people helping me. Like I said, my wonder mother (who was essentially my wedding planner and coordinator and this day would not have been possible without her perfect organization and planning skills) and awesome sister Kristen helped, some from my dad and fiancee as well but that was pretty much it. So when you see all the stuff start to pop up that we DIYed and hand made.....just remember we only had 4 months. If we can get this done in 4 months then so can anybody! Not to mention I got a new job, moved, and am taking graduate courses amidst all this DIYing and crafting!!

My mom, my sister and I on the Yacht at the tasting

Friday, July 16, 2010

Anyone Can Comment!

I have it set so anyone can comment on my blog, even if you aren't a gmail/blogger member. Just thought I'd let you know ;)

Table and Seating

I can't, at this point in the blog, tell you WHAT these are attached to and what they say on the front, but they are my DIY seating cards. :)
I got the tags at Michael's crafts , and used stamps from Michael's $1 section in the front! I used the stamps on the invitation envelopes knowing I was going to use them for these tags to tie them in to the wedding. I used orange and silver inks (those are my colors).


The family got "special" ones :)


Here are the stamps I used :) loved it!


And if you are going to DIY print your own labels for personalized things, you are going to need this: keeps the ink in place and gives a nice matte finish so you don't have to worry about smearing! Thank you UF Interior Design classes!